Homeless Connect April 2015

We had the honor of being invited back to help at the Photobooth at Homeless Connect held at The Shaw Conference Centre on the weekend.  It was a great day with my husband, Derek, printing the photos, and Sharon Block as my co-shooter.  As usual, my favorite photographer, Laurice Block, was also in attendance to set up the lighting and to help shoot when we needed a break.  Laurice had broken his big toe just a couple days before and wasn’t sure he would be able to make it; but of course he toughed it out and was there the entire day!

I had one lady come back towards the end of the day and told me that she HATED her photo. I must of had a an awful shocked expression on my face because she burst out laughing and said “I’m just kidding! I LOVE my photo so much. My husband looks so handsome in it, I just want to take him home right now!”  I thought that was priceless… 🙂

Below are some of the photos taken at the photobooth:

._DSC0005_6265_edited-1 _DSC0004_6264_edited-1 - Copy _DSC0003_6254_edited-1 - Copy

_DSC0002_6270_edited-2 - Copy _DSC0005_6271_edited-1 _DSC0002_6267_edited-2 - Copy

_DSC0007_6251_edited-1 _DSC0012_6262_edited-1

_DSC0005_6256_edited-2 _DSC0008_6258_edited-1

The last photo of the little girl was my favorite.  She was so tiny and shy that it took her aunt a few minutes to convince her to have her photo taken with her.  Then I showed her the picture and I told her that she was so pretty that she needed to have her own photo taken.  Her aunt said that she is too shy, and won’t do it,  but the little girl surprised us all when she shyly nodded then quietly posed for the camera.  Every little girl needs to  feel pretty and worthy of her own photo!

With special thanks to:

Homeless Connect

Laurice Block Photography

Steampunk Photoshoot at Fort Edmonton Park

FX0_7615_3154_edited-1 - Copy

The Edmonton Steampunk Group is a vibrant, fun group of people who love to get together and dress  up Steampunk style!  They have an annual photoshoot every year to help raise funds for their annual ball.  This year the shoot was at Fort Edmonton Park. It was a very exciting, fun filled day!

FX0_7654_3193_edited-1_Snapseed - Copy  FX0_7626_3165_edited-1

FX0_7484_3023_edited-1_Snapseed - Copy   FX0_7530_3069_edited-1 - Copy

FX0_7802_3329_edited-2   FX0_7713_3252_edited-2

FX0_7721_3260_edited-1  FX0_7677_3216_edited-1


Check out the group on Facebook:https://www.facebook.com/groups/edmontonsteampunks/


The Clone Tool

before web  BEFORE

after web  AFTER

The clone tool is one of the first tools I learned how to use in Elements, and it’s still my favorite and most used tool.

I took this photo of my friend’s daughter at the park. I loved the photo, but hated the garbage can in the bottom right corner. I figured I couldn’t remove the entire garbage can because there were people right behind it so it would too obvious that something was removed. So I decided to only partially remove it.  If you didn’t know that it was originally a garbage can, you would just think it’s part of the playground.

Natural Light

Menasha Web

My friend and I took a walk down a residential street and practiced photographing each other. We searched for areas with interesting backgrounds and open shade. I was really pleased when she told me she really loved this photo.

Back lighting (or Rim lighting) in manual mode

web1  web2

I was so excited to learn how to shoot back lighting in direct sunlight on the weekend!

First, you must shoot in manual mode. Have your subject stand facing you away from the sun. Stand right in front of their shadow so that you know the light will be cast evenly around your subject. Choose a high aperature (to blur out the background) and come in real close, fill your frame with their face. Focus on a cheek or eye, then adjust your shutter speed to find the proper exposure by zeroing out the light meter. Move back to frame your shot, focus on the subject, DO NOT ADJUST ANY SETTINGS, and click! That’s it! Your subject’s face should be perfectly exposed instead of being cast in shade.

Try having your model move their head or turn their body slightly (or you can move around them) to get the light to fall on different parts of their face and body.

A big thank you to Laurice Block for teaching us this trick at his “Demystifying Manual Mode” workshop on the weekend. If you are interested in learning some camera tips and tricks, make sure to contact Laurice at https://www.flickr.com/photos/lblock/

Inspired by FIFA 2014

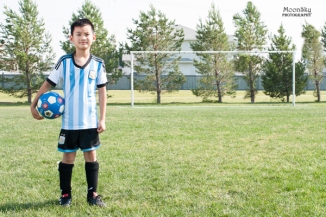
My son has always loved soccer, but this is the first year he really became interested in the FIFA World soccer games. We took him to get a soccer jersey last month before the tournament started, and he didn’t have any favorite teams but really liked the Argentina jersey, so he choose Argentina. It was really exciting and fun to watch as Argentina actually made it to the finals! They ended up losing 0-1 to Germany, and my son was disappointed his team did not win, but now he loves soccer even more. And Lionel Messi is a new hero.

I made sure to take him to a soccer field on Friday to get some photos of him in his soccer jersey, pretending he is in the game.  It was a very sunny afternoon so I used an umbrella and speed light placed as close as possible to his left side to offset the bright sun on his right side.


_DSC0250_2320_edited-2

_DSC0269_2339_edited-1

_DSC0259_2329_edited-1_DSC0284_2354_edited-3

Convenience of IPhone

It’s been a very busy week so I am cheating a bit by posting this blog from my iPhone while at a bbq at a friend’s bouse and using photos I took with the phone this week.

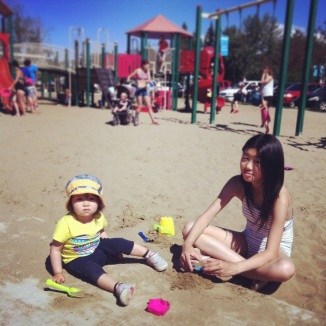
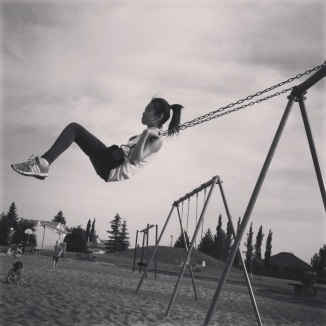
It was Canada Day on July 1 and I did take my Nikon D90 with me when we went to Sylvan Lake, but to be honest, I felt really weird carrying that bulky dslr around. Then I came home and have been too busy to even download the photos! I really enjoy the convenience of the iPhone. I take my picture and very quickly edit and post on Instagram. So fast and easy. Quality not as great of course but if all you want to do is share on social media or print little 3×3 prints for scrapbooking, then it’s perfect.

20140703-215529.jpg

20140703-215607.jpg

20140703-215632.jpg

20140703-215645.jpg

Working with an experienced model

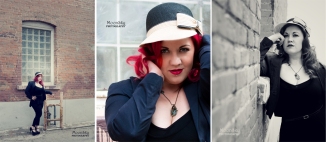
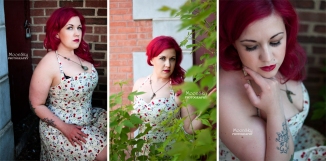
I was invited to a photoshoot a few weeks ago and met some very wonderful models, among them, Krissy Dewalt-Peters.  This was my first photoshoot in over a year (I had started a part time job last May and didn’t have any time or energy for photoshoots).  I was NERVOUS!  I approached Krissy, introduced myself and told her I am a little nervous and rusty.  Krissy gave a big smile and agreed to be my first model.  She was so patient, and so easy to shoot that I quickly regained my photographer eye and confidence.  What I was most impressed with Krissy is that she really felt comfortable in her own skin and could give me any expression/ look I asked for.  She has a playful sex kitten look that really appeals to the camera.

With an experienced model you really don’t have to give her too much direction, just basically give her an idea of what you are envisioning,and she just pulls it off, which is exactly what Krissy did!

When I find a great spot with good lighting, I want to use it as much as possible.  This was easily done with a versatile model like Krissy.  She stood in front of that window and worked it while I moved around her, getting different angles and shots.Untitled-1


The next set was shot in a tiny little corner behind some bushes.

Untitled-2

And this last one is my favorite.   I saw these cool bike racks and just really wanted to include them in the shot. I ask Krissy if she can just somehow make this shot sexy.  And again she does her magic!  Nothing is boring when you have a model like Krissy.

_DSC0266_1269_edited-1_Snapseed

Krissy lives in Edmonton and has been modelling for 3 yrs.  If you want to work with an excellent and experienced model, make sure to contact on her Facebook page: https://www.facebook.com/BettieBuxom?ref=br_tf

Some photoshop tricks with Elements 12

This week I thought I’d show some  tips and tricks I  used to combine 2 photos to get the final resulting image.

In this photo, the sun was too bright and I didn’t like how the model’s leg was positioned. My good friend Laurice suggested holding  up a scrim to filter out the bright sunlight. In Photoshop Elements, I added both photos to the photo bin.  I opened the first photo,  chose the “clone” tool and alt + clicked on  the line of trees. I then opened up photo #2 and simply cloned Laurice out. So easy!

edit 1

With special thanks to Laurice Block.   Laurice is a great teacher and photographer! Check out his work on Flikr: https://www.flickr.com/photos/lblock/


Garbage bag dress photohoot

group 1

We sure had fun shooting these models! They created their own “haute couture” designer dresses made from garbage bags then bravely and confidently showed them off.

34    21

15  5

With special thanks to:

Venita for organizing the models and helped them create the fabolous dresses

Steven for helping us find the perfect location for the shoot

Raveena, who was one of the models and the MUA.  She did such a great job on the makeup!  Make sure to check out her makeup blog: http://raveenasbeautydiary.blogspot.ca/